Exploring the world of fiber, one draft at a time

My posting can be as frequent or infrequent as my spinning, so be as patient as that fiber, sitting in my stash.

Thursday, March 31, 2005

Finders-Keepers


Fiber for spinning


Stamps for sorting

Which picture makes your fingers twitch to dig in?

I suspect most of you will say the first. The fiber does that to me too, at least when I was shopping, as this is a picture of my latest shopping spree at the SWIFT meeting.

But the picture of the shoeboxes of stamps is what my fingers are digging through right now, and I have been thinking lately about the reasons why. And that led to thinking about how I blog about many of my hobbies, but not stamp collecting.

On a whim last Friday I spent an hour searching to see if anyone was blogging about stamps. I found some neat blog search tools, and out of the many blogs I scanned I only found three related strictly to stamp collecting. Compare that to the hundreds of fiber blogs now being kept, often daily, it really does make one stop and wonder just what it is about this fiber, knitting, textile hobby that makes it so intensely interesting, Conversely, for me it leads me to wonder just what keeps me going back to the stamp collecting hobby since childhood.

Oh I have answers! Did you think those were rhetorical questions? Answers are what I hope come out of writing this entry.

First of all, do you have a hobby that directly reminds you of happy times with a parent? If so, then I bet you go back to that hobby at least now and then in your life. With stamp collecting, I remember my Dad, and time spent with him, learning all about how to recognize what country issued the stamp (so I still collect worldwide) learning the tiny details of how a stamp is created, learning at last how to value the stamp. There are two values to that tiny piece of paper, one, money because so few exist anymore, or two, even if it is only worth a nickel, if it is that last stamp a collector needs to fill a space in their album the value to them is priceless. Especially if they found it all on their own, while going through a big pile of stamps.

So to follow this line of thought, are many of us blogging about fiber because it reminds us of a childhood relative? I know I think of my one grandmother every time I knit. And many more relatives would have had to knit, weave, quilt, etc so there are more of us blogging about those skills.

In truth though, I know there are few stamp blogs because there is just no way to make the hobby interesting to a large number of people. It is an intensely personal hobby, sometimes shared but often persued in the quiet evening hours or a long rainy day (my Dad once told me that a neighbor said to him when it was raining, that he supposed he was having another dumb stamp day!) Even I, as much as I love stamp collecting, found the three blogs about the hobby, well, er, boring! It helped me make the decision that it really was not worth my precious internet time to start a blog about stamps, unless I could write a beginners how to....oh oh, I hate it when I have more ideas than time.

I found out some other interesting information about searching blogs, while looking for stamp blogs. It seems it is still very difficult to search the internal information of blogs. What is being searched is the title of your blog. I read several articles encouraging bloggers to make many blogs of specific information and then label your blog with key words pertinent to that topic. And those that carve and create the internet are working hard to find ways to search the internal content. At least I hit it right when naming this blog, it really is mostly about my spinning (and I am sure the reader doubts it at this point, but I promise this is the last of the stamp blogging here). I like having the link function on my sidebar that shows where this blog was discovered. Mostly of course it is from the rings, but now and then I see hits from Google.

The picture of the boxes of stamps are what I have to go through, left over from cleaning out my Dad's accumulation. Over the last three weeks, I have done nine boxes already. Hey, each box weighs from 1-2 lbs, even spinners can relate to the feel of victory over 9-18 lbs of anything! What does that mean, going through the nine boxes? It a thrill of the hunt. I could blog about the elation of finding a PNC #2 single of a bread wagon issue. Huh? It's just a different language. If I said I spun a 2 ply 21 WPI yarn on a 17:1 ratio, you'd know exactly what I mean.

The difference is in the fact that the yarn will have a future use, the stamp is just plain treasure. And we all know one man's treasure is another man's trash. That is why I and many others wade through piles of common everyday stamps. We are looking for the one that will make us go WOO HOO. The stamp I mentioned above is not worth much. It would catalog for .65 and I could probably sell it for a quarter. Why was it a find? Because I had it's siblings, plate numbers 1-3 and now I have added to that collection. Would anyone else find that interesting? Probably not.

In the end, it is probably just the old childhood language coming back to life in me: finders-keepers!

CW

Wednesday, March 16, 2005

A Long Ago Sewing Lesson

I love a good auction, and I had the good fortune to attend one this last weekend. What makes it a good auction? Ah, that would be answered differently by everyone. For some, it is finding a great bargain. For others, it might be finding the rare item in their favorite collection. For me, it is finding a bit of personal history, tucked away where few would look.

In one of the box lots at the auction I noticed an old composition book. It was paper covered, somewhat dirty and well used. The yellowed pages were intact though and to my surprise contained some young girl's hand sewing lesson. I had to buy a box full of uninteresting postcards, as well as seven Top Value Stamp books, to win this little gem of personal history.

I have enjoyed going through each lesson and admiring the handworked samples attached to the pages, and thought I would share some of it here.

Lesson one looks so neat! Here is the student, new book, maybe new fountain pen, new start of the lesson. Impressing the teacher was a priority. The writing is lovely script, and the lesson is just a group of sewing term definitions. The student recieved a B.

Starting with lesson two, there is a list at the top, obviously the lesson plan. It lists what the sample shows, the material, the type of stitching, the thread and needle used. Linen toweling is used to show bastings, and various hemming styles. The scant lesson states that the overhanding (sic) stitch is one thread deep and two threads over, a permanent stitch, straight and close together, done with the needle pointed toward the chest. The lesson was too scant for the teacher though, the student received a C-.

Now the lessons get harder and each take several pages of the students unique handwriting to convey. In lesson three cuffs are discussed as well as how to lay a pattern on the material for cutting. For some reason there is no fabric sample for this lesson, although the lesson plan calls for a cambric fabric. Lesson four makes a hemmed patch in a damaged garment, the sample showing 'material from home'. Remember, this is all hand stitiching. In lesson five, a komono was constructed, using according to the lesson plan, a combination stitch, catch stitch, feather stitch, flat hangers, hooks and eyes, and self made bias facings. The type of fabric used was not listed, and there is no fabric sample for this lesson. The notes go on for eight pages and looked hurried, like maybe now these lessons are pushing the student hard to stay with the class. The teacher did not like the students explanation of making bias strips and noted that on the lesson.

Suddenly the next page is lesson 8 and it is one that impressed me the most. In it the student does a blanket stitch, and invisible mending. This is where I started again realizing how much of the hand sewing skills I have not learned, being so relient on my fancy sewing machines. When one looks at the black piece of fabric, with the white blanket stitching on the edge, that seems to be the only thing there. On close examination though, you can see where an 'O' and 'J' had been cut out of the fabric and then invisably mended! If you turn the fabric over you can see the square of like fabric attached to it, but the stitching is so fine (and I might add, so black!) that from the front none of that is visable. I gave the student an A+ in my mind, but the teacher, ever strict gave a B.

The student is now ready to do visable stitching, and so the next lesson is button holes. Yes, hand stitched button holes, thirteen in all, running in a straight line up the muslin fabric sample. The sample piece is folded over, doubling the fabric as in real sewing and the edge of the sample was (although not neatly) stitched closed. No frayed edges for this sample! Also practiced were six blind loops, used I believe for hooks. The student is concentrating hard now on the hand sewing, because the written lesson looks just like any of us would write, when in a hurry. There are many spelling errors, corrections of syntax by the teacher, and in a list of questions at the end are points to the lesson that were not addressed.

We are now up to lesson 11. At the top of the lesson plan are the words, Gathering & Stroking. Stroking? Turns out, as I read through the less hurried lesson (and so much better handwriting) that after doing the traditional running stitch and pulling up the gathers the student writes "We then stroked the gathers in this way: We took a sharp steal (sic) pin and pushed each gather close to one another and the first real close to the needle and brought that pin on down this leaving each gather finished." While there could probably be a few punction marks to make it clearer, I realized that stroking was the process of straightening and aligning the gathers before attaching the cuff band. The three written pages of the lesson was not enough for the teacher, at the end was written, in a lovely script, "How is band placed to garment? Which side was held toward you while gathering and stroking? Which was held toward you while pinning, basting and sewing on band?" Ah, details, details, that teacher definitely wanted details!

There are two lesson 11's in the book. I am sure by now our student has lost count! This lesson constructed an apron, both a large 'for real' size one (which the student got to put lace trim on the hem line) and a tiny two inch sample. The material is listed as Indian Linen, and is a fine sheer muslin. The tiny apron is complete in all details, tiny hem, tiny gathers, tiny band. The only thing missing is a tiny button on the back of the band, used in the real garment to wear the apron.

That was the last lesson in the book. Spring's here, school is out. Or were these after school lessons, given by the local seamstress for the improvement of the young ladies sewing skills? I will never know. Still looking into a bit of that one girl's young life is something I treasure. I know somewhere along the line, she had spring fever because on the very last page is written this poem:

Just a bunch of wildflowers from your far off home,
Gathered in the valley where we used to roam.
Maybe they'll remind you of a heart still true,
Just a bunch of wildflowers that I picked for you.

She may have never given that old composition book a second glance after that class. She may have hated sewing and never took up needle and thread again. But I am glad if was saved and will pass it on someday, for the sheer history of it, and use it while I own it, for the inspiration of just what could be done with only a needle, thread and fine fabric.

CW

Auction finds


Look what a dime use to buy!

I did make several purchases at the auction I attended last Sunday. The above magazine was just one of three that was in one lot, which also included several Ladies Home Companions from 1898. The Ladies Home Companions were not in very good shape, but still interesting to look through. They included a few needleworking patterns, but are mostly stories, ads and items that the ladies of the late 1800's would find enjoyable to read. I much more enjoyed the Needlework magazines, full of true 1920 knitting patterns, lace knitting, tatting, embroidery and of course ads. I think I missed my calling by not going into the advertising profession, I find it very fascinating (and yes, I watch the super bowl for the ads!)

I won very little at the auction and stayed the whole day. But the items I did win I am very happy to now own.

CW

Thursday, March 10, 2005

SWIFT annual meeting

Last Saturday I was able to attend the annual meeting of SWIFT. This is an active guild for spinners and weavers in Indiana that draws folks like me from neighboring states. I have been a member for a number of years but usually the annual meetings fall on a weekend when I have to work, so I was pleased to be able to go this year. It is held at a place near Indianapolis called Conner Prairie, which looks like it has several interesting things going on during the year and may be a place I will want to visit again.

The first thing to greet me when I walked in and set down my spinning wheel was a 12 hour old baby goat. It was not a fiber goat, but a milking breed, an alpine. I have always had a soft spot in my heart for goats since I use to raise Saanans and Nubians. All babies are cute, but this little one was just adorable. It was the smallest of triplets and mama had not taken to it so it was being bottle-fed and was happily snoozing in a small laundry basket on a blanket.

The next best thing was shopping. I treated myself to 8 oz of Yak down for only 12.95. It is a deep brown color and I plan to spin it on a drop spindle. The next bargain was a buy one get one free pound of bleached irish linen roving. Now I have not spun linen before and I know roving is not the usual way to purchase linen. So either I got a great bargain, or two pounds of pure challenge! I have been reading on Spinlist some of the suggestions for spinning linen and will keep those in mind as I try this fiber. One suggestion was to spin outside because it tends to give off a large amount of fluff. Well, it cannot be any worse than angora for that! Another suggestion was to premoisten the fiber and keep a bowl of water near by while spinning. The biggest concern seems to be the fact the fiber is so short, and bleached which makes it even more fragile. I think I can handle the shortness; it should be similar to spinning angora (more so than cotton at least in how it feels). I will try a 2 ply well stretched while it dries. Maybe if I get a decent yarn from the linen I can use it for doilies. Or if I can get it smooth enough, maybe it will work with my knitting machine. Ah, knitted linen placemats, truly unique! As you can see, it will definitely be a challenge. The last thing I purchased was a dyed wool and linen blend roving (I detect a trend here). I fell in love with the silver purple color of the wool with the white streaks of linen. I don’t anticipate any problem spinning this unless the linen fiber just refuses to blend with the wool as I draft. I am sure there will be more posts on here about these fibers as I work with them.

SWIFT held the regular meeting after lunch, along with a roll call of guilds. Then there was a show and tell time on that year’s theme of ‘anything black and purple’. This ranged from showing a ball of black and purple handspun with many intentions, to a floor length hand-woven purple coat with a black border. In between there were felted mittens, wall hangings and cat toys as well as woven scarves and a woven band with purple sheep! There even was a quilt of purple. Next year’s theme is ‘a blue moon’. Now this stirs my creative juices, not only to anything in blue, but also the thought of doing something that one rarely attempts. Tatting? Bobbin lace? It will be an interesting show and tell.

The meeting ended with a slide show and talk present by Lewis of Little Barn Fibers on antique spinning wheels. I found it very interesting to see photos of some of the wheels unknown to me. Lewis was full of informative tips on various makers of wheels, as well as what makes them rare or common. I wish now I had taken notes. The one that I remember best is the gossip wheel. He states that this wheel was not designed for two spinners to sit and spin (and gossip) at the same time, but for one person to spin two bobbins at the same time. It boggles my mind that anyone would be able to draft and control fiber in both their right and left hand and spin a fine linen thread, but according to him that is exactly the reasoning behind the design. He said he had only seem the gossip wheel used in that fashion once, and the spinner drew the flax from one source with both hands and spun it with each hand onto separate bobbins. Since all linen thread was hand spun in those times, and since it was often children spinning 16 hours a day, I imagine it would be possible to develop that skill. I doubt though that it was a home skill used by those that spun for family use only.

For me, I was content to just spin a single bobbin with two hands, on my Haldane during the spin-in and the meeting. I cleared some of the bobbins by plying what was on them, and then spun a lovely silver gray llama fiber. And even at that, I barely filled one bobbin, with all of the eating, talking, laughing and baby goat hugging going on around me.

CW

Monday, February 21, 2005

I should have made it a vest

I am knitting again! All it took was a 16 hour car trip to visit my mom. I love car trips as long as I can have my knitting, and a book on tape.

So the mohair stole is 3/4 of the way done and looking wonderful. And the cotton cardigan for my daughter now looks like a vest and only needs sleeves.

I want to pick up stitches around the armhole on a circular needle and knit from shoulder to cuff. I think this makes a smoother join at the shoulder to the body of the sweater, and I can gauge better just how long to make the sleeve as I knit.

I found out though that doing this is not just a matter of reversing the increases to decreases, especially at the very beginning when trying to figure out just how many stitches to pick up for the sleeve top. If the sleeve was just a plain rectangle, that would be easy, but with the shaping of the top of the sleeve I found I was having a very hard time going from knitting flat to knitting in the round.

The sleeve is simple in design, almost a rectangle. In the actual pattern a number of stitches is cast on at the cuff edge, and increases are done on each side of the sleeve over most of the length of the sleeve. This is a very standard sleeve design. About 10 rows from the finish at the shoulder, 6 stitches are bound off on each edge. Then 6 more stitches are decreased over the last nine rows and the remaining 82 stitches are bound off. The shape of the sleeve is boxy, not a rounded cap.

So in my first attempt, I picked up 82 stitches around the armhole, increased to 88 sitiches over the next nine rows, and realized, if I was really to do the reverse of the bind off of six stitches on each edge, I would increase six stitches, and on a circular needle, that's just sort of messy looking. I think in the end, being under the arm, and blocked, it would be OK, but I just am not happy with the results so far.

In visualizing just how I would have sewn a sleeve made by the original instructions to the armhole of the sweater, I realized I would have put those bound off 12 stitches (six on each side) side by side on the underarm, and then eased the rest of the top of the sleeve around the armhole.

So my next idea is to pick up 12 stitches at the underarm area of the sweater, work back and forth until I have picked up 6 more stitches, and then pick up the 82 more stitches around the armhole, close the stitches into a circle, and continue with the gradual decreases as I work my way to the cuff.

I think this is the basic gusset design, but I confess I have not knitted a sweater with an underarm gusset, so I can not be sure. I don't think the sleeve will look exactly the same as one that I knit flat and sew to the sweater, but I do think handling it this way will help the ease and fit of the underarm area.

But I have not tried it yet. I have 10 rows done on one armhole, up to the point of the increase of 12 stitches at once. I think I will leave that sleeve alone and try my idea on the second armhole, then I can compare which one looks better.

No wonder vests are popular!
CW

Tuesday, January 25, 2005

Move Along

There's no fiber content here.

I thought it would bother me more to type that, but life has been busy and productive in other areas, and there just has not been time to make any progress on any of my fiber projects.
Right now in my life it's all about archiving. I received a wonderful printer for my computer for Christmas. It allows me to scan my photo negatives and put them into my computer, and then burn them on a CD. I have been working through about 30 years of negatives, with the main purpose of at least getting them saved in case they were ever damaged. Why I would worry about that after they have made it through 30 years is a mystery to me too.

And when it became evident two weeks ago that our second and last VCR was just not going to work anymore, we purchased a unit that will play both VCR tapes and DVD. That means I am able to make DVD's from my vast collection of taped programs. This is not so much an archiving activity as space saver. Imagine the difference in space that 50 VCR tapes and 25 or less DVD's take. That's a big space saving.

And last of all there is the stamp closet to clean out. This is a small storage closet in my computer room that is filled with all of the inventory from my Dad's small postage stamp business. I am gradually working my way through it, keeping what I want and preparing the rest for selling. It's interesting and fun for me because I am a stamp collector, and love the bits and pieces related to that hobby. Saturday night I went through a box that had nothing but used envelopes. Most of them are trivial, and will give up their stamps to go into someone's album. But some were real gems. There were envelopes, with letters included from the early 1900's. The writing is spidery and faded and often hard to read. That which I could read spoke of details from the daily life not much different from what I would write now in an email to a friend. The part that makes me set this envelopes into the save pile, is that they survived this long already. Some have some value to them, written on Red Cross stationary, telling the recipient that their son was in the hospital but recovering. It's such a tiny slice of life in those envelopes, a peek into the past that keeps me involved in this hobby.

So this post is to let you all know I am alive and well and not knitting. I have been thinking about knitting, reading books about knitting, but no yarn has passed through these fingers for weeks. I doubt that will last long.
CW

Sunday, January 09, 2005

What a difference a technique will make

Normally I have no problem at all spinning a commercial roving. But once in awhile I run into one that gives me some grief. I found this alpaca/silk roving when cleaning and organizing my stash, and remembered that I had stuck it away because I found it very difficult to spin.

Usually when spinning roving, I can just spin straight off the end of the roving. The fibers are aligned and I have no problem spinning a nice smooth yarn. Once in awhile, just like this roving I find that spinning straight off the end, I run into several problems. One the fiber seems compacted in some areas and not in others, and even drafting doesn't keep clumps from jumping into the twist while I spin. Another problem, probably related is I run into areas where the fiber just runs out, like all of the fibers ended right in the same spot.

At first I thought I would solve this problem roving by just drafting as evenly as I could, and spinning with a very light twist, very slowly, and making a bulky yarn. I still had lots of thick and thin areas doing this though, and was not happy with the resulting yarn. In a moment of playfulness, I tried taking the thick single and plying it with a commercial yarn from a cone of machine knitting yarn. The thought behind trying this was, if the thick single was already thick and thin, wrapping a commercial yarn around it tightly would create even more of that effect. It seems like it would work. What I found though was even spinning with high twist, the alpaca refused to be wrapped with the commercial yarn, and the resulting yarn looked like roving just barely spun. It was highlighted the two things I didn't like about the alpaca, that it wouldn't take a good twist and hold it, and that the slippery fibers refused to be wrapped. I think it might look good once knitted, but in the long run it was not a yarn I really wanted to make.

This morning, I finally remembered my solution to a previous roving like this, a technique called spinning from the fold. I got out my wheel, took a hunk of roving and folded it over my index finger and fed the fiber into the drafting triangle from that fold. It worked wonderfully, and I was able to create a yarn that will be of the same WPI as other alpaca yarns I have spun. This was necessary if I really wanted to make something from this yarn, since I only have about 6 oz of this roving.

In the picture below, the first yarn is the single plied with the commercial yarn, the middle yarn is the bulky 2 ply and the final yarn is the 2 ply spun from the fold. The commercial yarn is very thin, and is not visable in the picture, and there is so little silk in the mixture that very little shows in any of the samples. That just hint of off white is the silk.


Three samples from an alpaca/silk roving.

I am glad I found a way to spin this roving because the color is a deep brown that I love. I am sure I bought the roving for the color with no idea I would have trouble spinning it. Now I can pair the yarn from this roving, with another alpaca color in a shawl.

CW

Friday, December 31, 2004

What's in Your Resolution

To keep the list from getting too detailed and therefore overwhelming, I limited myself to a five minute jotting of what I'd like to do this next year.


Make a sweater on the knitting machine
Make charity blankets (warm up america) on knitting machine

Try several things on the triangle loom
Regular shawl with commercial yarn
Regular shawl with hand spun yarn
Felted shawl with handspun wool
Blanket with wool locks (two triangles)

Work through the knitted squares in the Great Aran afghan book

Locate and buy Barbara Walker treasury books (I have one volume already)
Read Barbara Walker non knitting books from library

Go to the main library more often! (great collection of needlecraft books)

Wash four complete fleeces and document spinning of those fleeces

Write comprehensive article on doing the breed sampler
Research any breeds missing from sampler

Finish daughter's cotton sweater
Start sweater for me in handspun

Felted cat cuddler in handspun

Play with beaded tapestry crochet design idea

Sewing projects
Tree skirt with exchange blocks
Blocks for floral spring exchange
Scrappy quilt top
Corduroy slacks for me

CW

Thursday, December 30, 2004

Machine Knit scarves


A sampling of the 18 scarves I made on my knitting machine.

OK, so they are basic, not fancy and acrylic. Still, they were welcomed by everyone that got one for Christmas, and I had lots of fun feeling productive. I used the thin yarn my standard machine needs, knit them twice as wide as needed and doubled the scarve longways and sewed a seam. I left the ends open but once I had turned the scarf inside out, I closed the ends with the fringe.

I am still at the base of the learning curve on my knitting machine, and I get frustrated everytime I try something new. These scarves gave me a project that required no new learning, gave me the fun of seeing the yarns I bought turn into cloth and satisfied my need to give handmade gifts to my husbands large family.

Machine knitting is deceptive though. One thinks a project can be whipped out in a fraction of the time it takes to do by hand, which is true. What a knitting machine does not do, is cut the finishing time on that project. It takes just as much time to finish a machine knitted item as it does a hand knitted one. I think my knitting and spinning buddies thought I was going to be putting fringe on scarves till the day after Christmas, it was my constant project over the month of December meetings.

Still the finish work is what makes the project look good and it is worth the time in the long run. When I had all 18 scarves all washed, fringe trimmed and a final pressing, folded up and ready to wrap, they looked great.

I really need a challenging project now on the knitting machine. I have the time and no pressure of gifts to give. I think I need to paste a picture of these scarves by the knitter, just to keep the enthusiam they created into the next project.

CW

Wednesday, December 22, 2004

Tiaras


We have said in our spinning group that every woman needs a tiara. So for Christmas, I made one for everyone!

I have discovered that in the world of machine embrodery there is someone that sells just about anything digitized for sewing. Several months ago I found a source for sewing out these freestanding embroidered tiaras.

I started these on a whim, as a joke for my spinning buddies. As I worked on them though, I found I really enjoyed seeing the tiaras develope, and had fun digging through my stash of ribbon and shiny stuff to decorate them.

The tiara itself is sewn onto a stiff water dissolvable plastic called Romeo. It is put in the hoop, the software for the tiara design transferred from my computer to my Pfaff machine, and then sewn out with shiny embroidery thread. After the stitching is done, I could pull away the big pieces of Romeo, and then soak the tiara in hot water until the Romeo between the design areas dissolved. This left the embrodery stiff and if I propped them up in a curved arrangement while they dried, the fit the curve of an ordinary headband. I glued ribbon to the headband, and then lashed the tiara to the headband with more ribbon. The final touch was to glue 'jewels' on spots that the embrodery widen to allow just such decoration.

Everyone was very pleased with their tiara. The fushia one went to Anita, who will now forever be called the Knitting Goddess (she does know just anything you want to learn about knitting). The green one went to Theresa, our gardening goddess. The black and silver went to my once goth daughter, now fantastic knitter. One is a very pale silver, that went to Viki, our spinner of cobweb (I thought silver was like spider web in the morning). And finally to the center of the fiber universe, Annie, a white one, which she promptly had to hand over to her future heir and daughter, the princess. Maybe she will get it back, while the princess sleeps.

CW


Monday, November 29, 2004

A Picture worth many words


About three months worth of spinning

I could just leave it at that, but well I have never been one to post a picture without saying something about it!

The lincoln and shetland were samples given to me by various spinning buddies. The color in the photo is not true, the bottom shetland is a lovely gray. So is the angora next to it, in fact they almost match exactly in gray coloring. I have no plans for the shetland and lincoln, I think the small skeins like that will eventually be put in the aran afghan that I have plans to knit.

I have no plans for the angora, I probably will sell that skein. The black welsh mountain was spun with the plans of being knit into a felted bag, with needle felted flower design on the side. The mystery fiber (CVM?) is very slubby and I have not really decided if I will do anything more than maybe make a square for the ongoing warm up American afghan that my knit group works on all the time.

The alpaca is of enough yardage of the same color that I could get a shawl from it. I have to swatch and decide just what type of shawl I want to make. I am still considering whether to dye that yarn or not, it will depend on what pattern I finally pick.

CW

Recent machine knitted project

I just knit this last Friday and Sat, and crocheted the edging at my knit group on Sunday. I really like the drape, and feel of this blanket. It surprised me since I was mainly selecting the yarn for the fact it was thin enough to work with the standard machine, and was a non pink or blue color, since the recipient is not going to know the sex of the baby until birth.

Here's a link to Elann's site to show you the yarn. It is in the color rock candy.

I always learn more with each project I knit on my machine. This was the first project I worked with yarn not on a cone. I know why machine knitters prefer coned yarn. I could get 50 rows from one ball of yarn, and believe me, 50 rows can go fast, and all of the sudden you may or may not notice you are out of yarn. If you don't notice, the knitting machine zips your stitches off the needles and the project falls to the floor. I took to watching the yarn in the feeder very very closely for just that reason. It's worth the effort for a very lovely yarn, however if one can find a very lovely yarn on a cone it is all the better.

I used five balls of yarn. I made the blanket 180 stitches wide and 250 rows long. My tension was loose at 9 on the carriage and +2 on the mast. I used a half of a ball to do crochet edging around the blanket. The edging consisted of a row of single crochet, a row of double and a final row of single. Nothing fancy, but it served to stop the edges from rolling. I washed and threw the blanket into the dryer on low heat, and it came out ready to use. No pressing, which is very impressive for a stockinette stitched blanket.

The picture is not that great, but the blanket turned out better than my expectations.


Machine knit baby blanket in Microfiber

My current project on the knitting machine is an acrylic scarf for everyone in my family for Christmas. I have 10 knit up, washed and pressed. I still need to sew the scarves together in half long ways, to make a doubled fabric. And I have 8 more to knit.

CW

Time Flies

And that must mean I have been having fun.

I literally took a break from the computer for most of the months of Sept and Oct. I did get to read blogs about once every two weeks. And there is always email, and the occasional fiber group that I remain active and receive their mail.

But the outside chores are done now, and I find I now am spending my typical 2 hours or more online. Sometimes I am just playing those darn addicting computer games. Sometimes I am reading blogs or live journals. And I am going to try and get back into blogging more now too.

It's been a nice break, and it's nice to be back. I still like the idea of a photo and written journal of my fiber work. I feel by taking this break I did lose some of the daily tidbits and will only be able to update some of the highlights.

Meanwhile, the baby bunnies have been growing and are now a month old.


Month old and surprisingly still in the basket, although I had to snap the photo fast.

There is a fourth bunny, and it is definately a runt. I am sure it is the one that was out of the nest over 24 hours. I am not sure that it will make it. It is literally half the size of it's siblings, and I feel that may mean it is not able to compete for food. I do not want to remove it from the mom just yet, it may be only getting it's nourishment from her. And it needs the warmth of it's sibs now that it is in the 40's in the barn. So time will tell. It looks just like the one in the front of the basket in the picture, only half the size.

CW

Thursday, November 04, 2004

Everyone say AHHH


Pepper's babies, 10 days old

If you want to know the story about these baby bunnies, read the post below this.

CW

Friday, October 29, 2004

And Then There Were Four

This is a bunny tale. However, it is not a fiber bunny tale. At then end of September, we received a phone call from my sister in law, asking if we could adopt a rescued rabbit. Since I have empty cages in my barn, and it is really not a problem feeding 16 rabbits instead of 15, I said yes. The "oh by the way" turned out to be they thought the doe had been bred. It was not really clear how they had decided this, but she was given the information that if the rabbit was pregnant, it was probably due around Oct 15th.

So I got the bunny settled into a cage, and held her now and then and she seemed to be settling in just fine. She's an unknown breed to me, I will have to get a picture posted and see if I can find out if she is a specific breed. Right now, she is just one of those lovely little pet rabbits a short haired, silver with black tips on her fur.
Around the expectant date, I gave the rabbit several big handfuls of straw. She promptly went into nest making mode, something I never get tired of watching. The doe will go through the straw, almost piece by piece, picking up certain ones in her mouth. More and more gets added to the mouthful, until eventually she goes to look for a place to put it. This involves hopping around from corner to corner of the cage, sticking her face down like she is trying out the straw for size. Eventually she makes a nest out of this process.

As much as I would love to watch this all day, I had to go to work, and I left her in the process of nest building, expecting baby bunnies in a day or two.

Or three, or four, or five....by the time five days past the due date had gone by, I decided she had just been spoofing me, and was not really pregnant. She dismantled the nest, ate some of the hay, chewed on the plaster board I had set under the nest, and basically just acted like a typical bored bunny.

So it was with surprise on Sunday night, Oct 24th that my husband announced when I walked in from work, that I had to get out to the barn. At first, with a few geriactric bunnies in the barn, I thought one had passed away. Oh no was his reply with a twinkle in his eye. It was then I knew, she hadn't been spoofing at all, but had had nothing with which to build a nest! My husband informed me that when he had gone out to feed that night, he saw lots of fur in her cage. Then looking down on the ground below the cage, he saw a baby bunny. It was warm, dry and had a full tummy. Searching again thoroughly, he found two more under the cage. In all of her dismantling of the nest, she had moved the solid boards, and in all of her trying to rebuild the nest, the babies had dropped through the wire. We were very lucky that it had probably not been all that long that the babies had dropped out of the cage. So we got the cage all arranged, the babies on the board, the fur around the babies, and gave her more hay. I saw her gently place hay on top of the babies and felt sure she knew where they were and would take care of them. I am still dismayed that she would not use the five gallon bucket attached to the cage for the nest. All of my angoras have instintctly used the bucket for a nest, but this bunny wanted the one corner of the cage from day one, and I worked it out so she could have the nest there.

Three babies. Oh I didn't care that they are not my fiber type bunny, a baby bunny is adorable no matter what breed. I went to bed smiling that night.

Monday I was off for the day. I went out in the late morning and checked on the nest, and they were snug and warm. I didn't disturb them much, and went about all of my day off chores. Later in the evening I went out to actually feed all the rabbits, and check again. As I was opening the feed can (I keep the 50 lbs in a metal trash can) I looked down on the floor beside the can, and there was a baby bunny! On the floor! At first I thought one had gotten out of the nest, but it was very far from the nest, we are talking at least 10 feet from directly under the nest and on another level of barn floor. Astondingly it was still moving. I picked it up and it was very cold, but I immediately took it inside and warmed it up in my hands for awhile. In a matter of minutes it was squeaking away and trying to nurse on my thumb. After about 20 minutes I felt it was warm enough to join the others in the nest. It only took a quick head count of those in the nest to discover that this was an additional bunny, and that it had amazingly been out of the nest for 24 hours and was still alive. So Then There Were Four.

I am happy to report the mother accepted this new arrival, because the next morning I picked each bunny up to inspect them, and they all are fat and thriving. I can not even tell if one will be a runt, from this experience. But time will tell, as they grow. Unfortunately, all four bunnies are the exact same coloration, there is not going to be any way to tell which one was the lucky well travelled bunny. If I could, I would name it Peter, for the others, all looking exactly alike, have to be Flopsy, Mopsy and Cottontail.

CW

Saturday, October 23, 2004

Classes at SOAR

My first class Friday morning was Making Your Old Wheel do New Tricks (which had many other versions suggested for the same class, like making your new wheel do old tricks). This was taught by Maggie Casey. Although she stated in her introduction that she was quite willing to take a hammer to a wheel if necessary, I seriously doubt that would become necessary under her skillful hands. She knows many wheels, inside and out. The class of eleven all gathered with their wheels, and in introductions stated just what problems they had been having with the wheel. I took my Haldane, a wheel I have had for two years, and that I only seemed to be able to spin sock weight 2 ply yarn on it. I wanted to learn if it was indeed the wheel’s limitation, or my not understanding the wheel’s potential. I use this wheel all the time as my travel wheel, like for my Tuesday night spinning group. It fits so nicely in the front floorboard of my car, and is light enough for me to carry with one hand.

The first thing we did was to take the bobbin and flyer off for a good cleaning. None of the wheels there had too much wear on the shafts, but if there was it was suggested that a light rub with a very fine steel wool or green scrubber pad would help. We also used a rig-up by Maggie to clean inside the bobbins. She took a heddle from a loom and tied just short and narrow pieces of cloth on one end. This could then be pulled though the bobbin to clean out the inside. She said she got the idea from watching a gun being cleaned. The rag on the end does make it a tight fit going through the bobbin but that does give it a good cleaning.

Other areas to clean were where the bobbin rests. I had always thought I was cleaning and oiling the wheel, but even I found one spot (one end where the shaft fits into a leather hole) that I hadn’t cleaned and a Q-tip removed a big build up of dirt.

And then we all oil everything, and were given hints as to whether our particular wheel needed oil in certain spots or not. Some wheels have the areas encased and so do not need oil. Others like mine benefit from oil on the actual wheel and shaft, and at the footman and treadle joint.

Next we talked about drive bands. Some drive bands were replaced on some wheels. Mine is a double drive, and probably could have been replaced, however the driveband on it right now is nicely sewn with a whip stitch, and we all agreed it was better to leave that alone until I really felt it being too loose. After discussing the condition of our drivebands, Maggie went into the different types of drives. The double drive band is the most traditional and most efficient. It allows yarn to wind on by the slippage method. The single drive allows the yarn to wind on by stalling the bobbin. And the Irish or Indian head tension, allows the yarn to wind on by stalling the flyer. This is all a bit over my head, however my fingers know the difference. I have a wheel of each type (and that was luck, I did not plan it that way) and have to change how I spin with each one.

We learned how to count the ratios on our flyers. You do this by putting a brightly colored yarn on a hook of your flyer. Then you slowly turn your big wheel one complete revolution and count the number of times the colored yarn goes over the top. I found out my Haldane had one ratio of 8 to 1 and another of 9.5 to 1. Not a big difference, and when I pondered outloud why there would be such a little bit of difference, Maggie replied, it just looks prettier with two ratios Well, in truth I knew the wheel was ratio challenged when I bought it, I only really wanted it for it’s overall size. One useful thing to remember, when dealing with a wheel with many ratios, is that a larger whorl =slower=less twist. Or the reverse, the smaller the whorl=faster=more twist.

Once we had given our wheels a good going over, we all started spinning. First just whatever type yarn was our habitual spinning. Then using what we had learned about drives and ratios, we worked on spinning finer. And later, doing the opposite, spinning fat yarn.

Maggie's whole point was that so many of us long time spinners learned on a very limited wheel (like the Ashford traditional) made back in the 70's. We taught our fingers how to make the type of yarn we wanted. The wheels being made today are highly engineered, and so we need to learn to let the wheel spin the type of yarn we want, not our fingers. For those in my class with the newer wheels it was very informative. My little old Haldane, is still only going to make very fine yarn if I control the process with my fingers. However, by having it in much better working position, I was able to spin much finer than sock yarn and I was very pleased with the resulting yarn samples.

There was so much more information in the class, I can only hit on the highlights here. And to be honest, if it didn't relate to my wheel, I only listened halfway, and wouldn't trust my memory now. Let me just say I highly recommend taking a class with Maggie, if you want to make the most of your wheel.

Combing class

I honestely have never seen so many combs in one place at one time! The teacher, Robin Russo had a variety of types (and I will not try and list each type, my memory would not guarantee that I get that right) and provided washed fibers for sampling. She had a lovely notebook page made up, with a space to write the fiber type, and
holes punched so you could attach the yarn sample. Yes she had us spin a sample of yarn, not much, maybe a yard or so, from every fiber we combed.

I have two sets of combs, the large Indigo Hound 5 pitch, which I did not take, and a handheld set of Forsythe 2 pitch. The class was listed as making the most of your hand held combs, so that was what everyone used. Robin had some larger combs mounted to a table for demo and for a few to try if they had not experienced working with them.

Robin was very insistent about using specific combs for specific types of fibers. In general, the number of rows of teeth determine how quickly the fiber can be processed. The diameter of the teeth determine what kind of fiber can be used on that comb. The length of the teeth will determine how much fiber the comb will hold.

She had samples of three types of wools so the class could see and feel the difference. She used a border leicester for the coarse wool, a romney for the medium type of texture and California variegated mutant (CVM) for the fine wool. All were lovely samples, and she suggested we split what we combed and spin into yard samples of bulky, sport and fine. I used a drop spindle for my sampling, it's just so much faster to spin up some, and let it self ply back on itself. Since I was using a lightweight spindle, trying to get bulky samples was hard. But I certainly enjoyed spinning super fine samples from the wonderful combed top, especially with the very fine CVM wool.

She also had a selection of exotic fibers, angora, mohair and alpaca. We combed each separately and made our sample yarn.

The most fun was getting into blends. She had lovely little bags of dyed silk, mohair locks, angora and white cormo. She had written suggestions of blends, like silk/angora or mohair and wool. I love combing mohair. It just burst into the shiniest top, and glowed with color. The cormo was too short in staple to really work with the very long locks of mohair so we were give coopworth instead. It was a good lesson to see that the staples of the fibers being blended need to be close in length.

That reminds me of an important point I learned, especially working with mohair. She had combing milk, and also plain olive oil and just plain water available and encouraged us to dampen the fiber slightly before combing. Her comment was if it use to have oil in the fiber use the oils, if not use the water. So no oils for the non lanolin
exotics, just water. I have been quilty of combing without that step and I got to experience the difference it makes. It really made the fiber manageable to have it just slightly damp.

I also have to report that I combed every single fiber on my Forsythe 2 pitch without a single bit of problems. The only fiber I had just a touch of problems with was the angora (and me the angora raiser! but I generally card my angora not comb it) The biggest problem I had with the angora was instead of wanting to fly all over, like it
usually does, I got it too damp and it stuck to my fingers

I also got to see Robin demo a set of Russian paddle combs. Oh now those are very nice! I think because they have so many close set teeth the colors are blended beautifully and compared to my wide set teeth on the Indigo viking combs, the top coming off those russian combs was very lovely and very fine.

I think that hits on most of the highlights of the class. If you have a chance to take a class with Robin, I would give a thumbs up for you to do so.


Tapestry crochet
Elaine Benfatto

This is going to be a hard class to describe. It really would be good if at this point you click on Elaine’s name and link and go to her blog to see pictures of some of her work in this technique. You will have to go back in time to her entries sometime around Aug or so.

I can not begin to try and tell you just how to do the technique especially if you are not familiar with crochet in the first place. Elaine had a good teaching challenge, with various levels of crocheting skills among her students. I was impressed with one teaching aide she used, a very thick yarn and a crochet hook about the size of Texas (well, you know what I mean) The students all sat on one side of tables, so that we all faced inward. She sat in the middle of the tables, and would demonstrate what she was saying with the fat yarn and hook. Made it very easy to see without all crowding around her. She also spent most of the class checking and working with each one of use individually.

What makes tapestry crochet so unique is that you work with two colors, making designs. You only crochet with one color at a time, and the other color is hidden under the bars of the color you are using. This makes a very stiff fabric, so much so, that if you make upright circles or squares, you get crochets bottles or boxes. And since the unused color is hidden, the project is completely reversable, or if not reversed, at least very usable without strands of color running on the back side.

Crochet makes a specific shaped stitch too, that will not work with regular knit patterns. So for designs, Elaine has researched Indian beading work, in particular the brick stitch. These tend to fit the crochet stitch better. So many of the designs are very Indian in motif.

I picked up the technique quickly but found it difficult for a number of reasons. First I had to relearn how to hold my crochet hook. I have always held my hook like I hold a pencil to write. This technique requires more of a stabbing into the work below it, especially if you work in the very fine cotton yarns and tiny crochet hooks. It is easier if the hook is held in an overhand method, your hand is on top of the hook, thumb on the left side of the hook, pointer finger on top and the other three fingers to the right side.

Another new skill needed is to tension two colors at the same time with your non hook hand. It is not necessary to do this, but just like working two colors in knitting, it goes quicker if one does not need to drop and pick up colors all the time. Dropping each color produces twists. Elaine has worked up a ‘path’ so that both colors are wrapped on your non hook hand, and the hook travels in and out of the colors. This way, no twist is developed, and one does not have to stop and realign the yarns all the time.

I could not get this technique into my fingers in just the class time. But I think given some time to work with it at home, I will be able to develop the needed skill.

Time flew by in this class, as we all worked on a small bag. I got mine about 2/3 done, and changed colors several times. I also worked on putting a triangle in as a design, because it is important to be able to see just where the color changes in the decreases to make a nice looking motif. This will be true of any design motif used, even following a chart it will be necessary to know when to pick up the new color and when to return to the background color.

There has been just a little bit written about this technique, so it really is an exciting new area to develope as more and more of us learn the technique.

Spinning with Spindles

I thought there were a great number of hand combs in that class, but it didn’t compare to the variety of spindles spread out in Andrea Mielke’s spindling class. She had done a fantastic job of gathering just about any type of spindle imaginable.

I think most of us in the class already knew how to spin on a spindle. Like me, most in the class had a particular type of spindle that had given them a hard time and were there to maybe pick up hints and tips for that.

So most of the class was made up of talking about each type, and what makes a good one in that particular class of spindles. She had spent time to create a very informative handout to take with us, a written reminder for those of us that by the fourth class of SOAR, now had overloaded brains.

The first thing I learned is that drafting for a spindle really is different than drafting for a spinning wheel. For successful spinning with a spindle one often has to be able to manipulate and draft the fiber supply with just one hand. Those of us use to a spinning wheel quickly discovered what a change this is, when we played with the most basic of spinning techniques, the hooked stick and fiber rolled on our laps. I also noticed that Andrea was holding her fiber differently, not pinched between the thumb and pointer finger, but pinched with the thumb and back two fingers (little finger and ring finger). The fiber supply was tucked between her pointer and middle finger. This feels very foriegn to my fingers that are use to the inchworm pinch method of spinning wheel spinning.

After we played with the hooked stick and trying to draft with one hand, we went on to construct a simple spindle by putting either a toy wheel, or CD's on the stick. She had these prepared before class so it was a simple matter to just slide them in place. We talked about the top whorl and bottom whorl, and how the leaders are placed for each and the yarn is wound on after spinning to create the cop.

Now we were ready to spin. All of us of course went right to our most comfortable way to spin (top whorl for me) but were encouraged to try different ways. So I slid my CD's to the bottom of my spindle and spent the rest of the class getting use to the feel of a bottom whorl. It really was nice in the lightweight CD style spindle. My only previous experience was with the very heavy wooden spindles that are so common for bottom whorl.

As we spun, Andrea showed us several 'tricks' to just make spindle spinning easier on your body. One is to spin horizontal to your body, so you are drafting out and away instead of up and away. The second was a tip for when the spindle reached the floor. Instead of leaning over and picking it up to wrap the yarn on, she wraps the yarn around some fingers of her drafting hand, bringing the spindle up to her! Then grab the spindle with the non drafting hand and wind on as usual. So simple, and yet so hard to remember to do!

The rest of the class was demonstrations of the different types of spindles, and a chance for us to try any that we wanted. I finally learned how a turkish spindle comes apart so the cop can be removed (shaft pulls up and out and then each 'arm' pulls out, leaving the cop). She demonstrated spinning with the Navajo spindle, and I spent some time trying that. It looks deceptively easy and is not. I could not keep the spindle spinning evenly with just a roll on my thigh. I could not keep it up and away from my thigh to let it continue spin. It all has to do with the spinner putting tension on the fiber/yarn to control where the spindle goes, and like any other of our fiber pursuits, takes practice to learn.

The same was true for any supported spindle I tried. When she sat and spun coton on a tiny Akha spindle she made it look so easy. The spindle kept going, the fiber flowed effortlessly out of her fingers, and the tiny cotton thread just flowed. I could not even keep the spindle going :) So it will be lots of practice for me. But that is not really surprising. One of the first things we teach to someone trying to learn on a wheel, is just treadle the wheel until they can make it do what they want. I need to just spin the spindles until that skill in is my fingers.

I think what I enjoyed the most about the class is just actually seeing all of the variations that have been created to spin yarn in a very portable way. Every culture has their own version, every woodworker their own designs, every inventor their own attempt to create the perfect spindle. It was fascinating to be able to examine these examples closely and even give them a whirl if I wanted.

CW

Sunday, October 17, 2004

SOAR detailed report

Our drive to SOAR was beautiful. Good thing too, since it took over 14 hours! I did not realize that Pennsylvania was set up with a big city on its western border, and one on it’s eastren and little in between. We drove a straight as an arrow route 80 right through the middle of the state.

The colors on the trees were not quite peak, but were still quite showy. I noticed the fact that there were trees with leaves a true red. That is very different than my area, where we get russets and maroons, but not true reds.

As usual for me, I arrived at the very last moment. The welcome for the retreat people was just starting. After introductions of the Spin Off staff, they then asked each of the teachers for the classes to be offered to say a few words, starting with what fiber animal they would be. Some of the comments were great. And every teacher gave a glowing report of what their class would be like, that I became undecided about which one to take. I thought I had it all solved before I left home, but after hearing the introductions, I wanted to take them all!

The sign up for classes was a well controlled chaos. Everyone had been given a colored slip of paper. All the blues sat in one section, all the yellows etc. Then a random color was called and that group got to go to sign up sheets set up on big tables in the room. Each class was being offered four times, twice on Friday and twice on Saturday. So your group went up a total of four times, signing up for your first choice then second choice etc. That part was easy, deciding what would be my choices was hard! And just to make everyone’s boredom easier, while waiting their turn, the SOAR staff gave away lovely door prizes.

I will give a description of the classes later. Let’s roll onward with just the extracurricular activities.

Thursday evenings dinner broke us into the routine. The dining room was set up with large tables, and you just chose one to sit. There was a menu printed for that day, and after being helped along but those that had been there for several days, we told the waiter which meal we were choosing from a selection of seven. A lovely appetizer was at each place, and after dinner you could go to a dessert table that was just decedent. Yes I ate dessert every night

After dinner, there was a fashion show. This was a very informal show, although it did have the category requirement of something to wrap around you. So there were scarves, lovely fine spun shawls and more of intricate patterns. There was even a boa, with a felted snake head at the end.

They had packed even more into the evening by offering a talk by Judith MacKenzie with slides, but I was truly weary by then, and went to my room to bed.

The next two days fell into the pattern of breakfast, first class, lunch (with drawings for more doorprizes), second class, meet my hubby at the bar for happy hour, dinner and then settling into a group somewhere to spin. The market was open now and then, and many folks shopped. I waited and went shopping Friday evening. At that time they were drawing names for doorprizes and you had to be present to win. So that’s when almost all of us went shopping. It wasn’t crowded though, as most had already done most of their buying and where just socalizing around the door.

It was fun to shop at vendors new to me. I go to many fiber fairs in my area, but the vendors stay the same. SOAR was giving me the chance to shop from some of the New England vendors. I purchased a pound of colored blue face leicester roving, it is a deep chocolate color and very soft. I bought 6 oz (all that was left of the color I liked) of a merino/silk dyed roving. That roving seemed to be a favorite of many of the spinners, and the teachers often had some for use in their class. I got a silvery/purple color. I also bought two 4 oz hanks of roving of a merino/tencel blend that I think I like even better than the merino/silk. It has a better shine to it. It will be interesting to spin. And last of all I bought a flicker card to use to clean my drum carder, or to flick locks from Strauch. And he had a tiny little hand card, it looks just like it belongs on a christmas tree as an ornament. What it really is for is to clean out your hand cards. I thought it was just great, and it now resides in my little bag that has my bottle of spinning oil too.

And best of all, while shopping, my name was called and I won a lovely door prize, a pound of dyed polworth top, from Rovings. Lovely fall colors of oranges, gold, red and browns.

I managed to get to the gallery three times during the weekend. It wasn’t that it was so big, that it needed that much time. I just went when I had a few minutes to enjoy again all of the beautiful things on display. The variety was amazing, as well as the creativity and technical skill. It was all set in a small library which just added to the cozy feeling of all of those wonderful scarves, shawls, sweaters, hats, wallhangings, rugs, oh my the list is endless. I have set myself the life goal of having something wonderful that I have made in a SOAR gallery sometime.

SOAR ended on Saturday night with the big spin in. The common rooms at Pocono Manor were large and full of windows. It was such a joy to sit in a class and look out over those colorful hills, and it was amazing to walk into a room Saturday night and see circle after circle of spinners with the wheels flying. Laughter abounded, flashbulbs flashed, winners of doorprizes whooped, and in the quieter moments lovely music was provided by harp and flute. I didn’t take my wheel that night, but sat and spun with a spindle.

Sunday was the long drive home, and I spent most of my non driving time knitting on the cotton sweater I am making for my daughter. I am finally seeing some progress on it! It’s not hand spun but yarn purchased from Elann. By Sunday I think my fingers were ready for something other than spinning. It didn’t last long though, because by Monday afternoon, while taking a break from laundry, I went right back to doing some spinning.

cw

Friday, October 15, 2004

Consolidating some of the past blog entries

I know I have the Sheep breed notebook information in several entries over the last years, so here is a listing of the dates. Just click on the archive on the side bar to get to the right month.

Breed notebook (past to recent)

Oct 14 2003 Breed Notebook part 1
Mar 12 2004 Rare Breeds part 1
Mar 19 2004 Rare Breeds part 2
June 11 2004 Working with Rambouilette
Sept 22 2004 Breed notebook
Sept 25 2004 Rare breeds
Non rare breeds

You really do not have to read them in order.

Also posts relating to washing fiber at home:

Oct 17 2003 Net bag washing fleece
Sept 14 2003 Washing cormo locks

Now you don't have to wade through all of my other posts to find these entries!

CW

Saturday, September 25, 2004

Breed Notebook Notes, Rare Breeds

This post completes the samples that I have purchased of rare breed fibers. The first post with additional breeds can be found in the March 2004 archives.


Rare breed Status: Rare

Karakul
The sample were long loose locks of washed wool. The color changed dramatically on the lock, going from deep black at the root, to white at the tip. Most of the lock was a lovely silver gray color. To me the fiber looked like Lincoln, but with a softer hand.

Combing: What I observed while combing was that the locks were splitting about halfway along the length of the lock. Half of the lock would end up on one comb, and the other half on the second comb. The fiber never would completely transfer from one comb to the other. I tugged on a lock and the same thing happened, so unfortunately this particular sample must have had a break in the fleece. And even though the combs went easily through the fiber, when it came time to pull top off the combs, it was difficult, and would only come off in what seemed like short stapled fiber.

Carding: This fiber is so much like Lincoln, I could not help but compare it to Lincoln as I was carding. Karakul seemed easier to card than Lincoln and the batt had more intregrity to it, unlike Lincoln that just seem to want to fall apart. Also, the karakul fiber blended better since all of the locks opened and were carded. When I carded lincoln, I had lots of little curls in the batt that did not open during carding.

Combed top: This spun into a nice smooth yarn, but I could not use any kind of drafting except a very short draw. The yarn was very slippery, and I found I was really pinching tight to keep the twist out of the fiber supply. The fiber felt rough on my fingers as I was spinning. My sample skein is only 5 yards at 11 WPI and is very twisted, showing that I still overspun the yarn.

Carded batts. Much nicer to spin, which just a regular drafting speed. The yarn is a lofty but scratchy 15 yard skein, at 11 WPI.

Leicester Longwool

This washed sample was a lovely light silver color with tan tips. The locks were long and very open with little crimp.

This must have been one of the first samples of the pack that I worked with, because it was all carded before I started taking notes. So I really did not get a combed sample, and now that I know about lock spinning, I would have tried to save some locks for that method too. As it was I only had carded batts to spin.

Carded batts: I am sure carding is not the best way to handle this type of fiber, although the batts were nicely carded and lofty. The yarn is a lovely tweed color, but the texture of the yarn makes it unusable for any type of clothing. My sample skein of 2 ply was 15 yards that measured 9 WPI. There was a very strong halo to the yarn accounting for alot of the scratchiness, I think.

I am sure there are better ways to process this fiber to give a wider range of uses. I think if it was lock spun, a wonderful crewel embrodery yarn could be created, there is plenty of strength in the yarn, and lock spinning or combed top would cut down on the fuzziness.

Rare Breed Status: Watch

Lincoln
This washed sample was made of long loose shiny locks in a white color with dirty tips. I decided to set some of the locks aside for lock spinning a sample.

Combing and Carding: The open locks combed easily and the top pulled off easily. In looking at the comb waste it seemed very nice fiber, just short. So I teased that open into little puffs to spin also. The locks were easier to card than I expected, the length was not a problem and the carded batts held together well.

Comb waste puffs: I have seen Icelandic fiber sold in 'clouds', these puffs of fibers reminded me of that. I found what looked open and easy to spin was not, the fibers were too mixed up to draft easily. I used a medium weight spindle to spin my sample, but was fighting all the time to keep the spindle turning, so that weight was not correct for this sample. My sample skein was 2 yards of a very fluffy loosely spun 2 ply at 8 WPI. I had occasional tips sticking out of the yarn, which were too deeply spun into the yarn to remove like a nep. It was a neat effect, but I could not get the effect consistently.

Combed top: I thought this was also hard to spin, due to the slipperiness of the fiber, I think. I used a heavier spindle for this and had better luck with that size as far as the spindle continuing to spin. I had trouble making joins while spinning due to the slickness of the fiber. My sample skein was very fuzzy for top and was 3 yards of 2 ply at 8 WPI. The luster of the fiber showed most in this skein.

Carded fiber: I spun this skein on my Roberta electric set with a high pull in tension and very slow speed. I used a very long drafting zone with almost no pinch behind that. It was pleasant spinning. My skein of 2 ply was just over 4 yards at 9 WPI.

Lock spinning: I had set four locks aside to try this method. One had a very matted butt area that I cut off. I combed each with a metal toothed dog comb, combing from the middle out on each end. The locks opened up nicely and most of the VM just fell out. I found while spinning I had to use a higher twist than the other samples, or the yarn just drifted apart while spinning. It was very easy to spin a thin single this way, although the yarn is so fuzzy, it deceives the eye as to it's thinness. My 2 ply skein spun this way was 4 yards at 18 WPI.

Rare breed Status: Recovering

Clun Forest

The sample I worked with was a washed off white fleece. It had a large amount of VM in the sample. The wool had a soft hand with a very springy feel to it.

This fleece was surprisingly easy to comb or card. It seemed perfectly suited for my small hand held combs, coming off in a very nice top. Since I had seen in other fibers that fleece that combs well often does not card well, that was what I expected. But I was very surprised to find that Clun Forest also carded up into lovely batts with my hand held cards.

Combed top: This was a delight to spin. It drafted easily into a long draft, and gave a nice smooth fine yarn. The only thing I observed was that it was such a smooth yarn, that it was difficult to make joins, when I started a new piece of top. I also noticed that this fiber needed a high twist, and that it really was unwilling to hold the twist. I especially saw this when I was plying, that the thicker areas in the singles were almost unspun. It was also interesting to observe that the yarn really expanded once there was no tension on it. I measured this sample of yarn as 15 WPI. It was a very generous, 25 yard sample.

Carded batts: I used more twist while spinning this. I tried two types of drafting, a moderate drafting zone gave a thicker yarn, with the neps often disappearing right into the yarn. An inchworm draft gave a much thinner yarn, but I had to stop and pull out the neps, which slowed down the spinning. The neps were not in the combed top, making it the better prep. This skein was 14 yards which measured 13 WPI, and was a very nubby looking yarn.

Southdown

The sample was an off white washed wool, that looked and felt like little puffs of cotton. There was lots of crimp to the fiber. There were also lots of short pieces in the sample, second cuts, so unfortunately that affected the spinning and the yarn.

Combing and Carding. This was one of those fleeces that are like night and day between combs and cards. Combing was a wonderful surprise. The fiber would transfer all back to the original comb. The puff of fiber on the comb was barely an inch long, but what was surprising was that I could pull off long top from that little one inch puff. In fact it was so much fun, I ended up combing all of the fiber. I used the waste from the combs in hand cards for the carded batts. I tried a wide tooth carder first, but did not like the batt. My fine tooth cards gave a nicer batt although since it was waste from the combs, there was VM and neps in the batts.

Combed top: This was as wonderful to spin as it was to comb. I spun my skein on my Roberta electric into an evenly smooth, fine yarn. It was very soft and springy and measured 15 WPI.

Carded batts: It turned out to be foolish to try and use the waste from the combs in the batts. I did spin the fiber on a drop spindle but it turned out to be a very lumpy yarn, almost looked like a beginner's spinning! I did not like the skein at all, but do not feel it is the fiber's fault, just mine.

CW


Breed notebook notes, non rare breeds

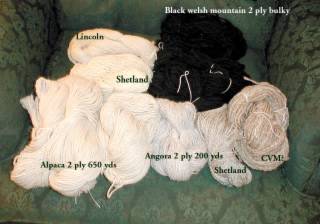
I have finished all of the samples of different sheep breeds that I purchased several years ago and am working on writing up the notes I took while spinning them. Below are the notes on breeds that are commonly available both as meat sheep and spinner's fleece flocks. There is no particular order to the list, it is just written as it appears in my notebook. It is by no means complete as to all of the breeds, it is just what was included in the 20 samples of fiber that I purchased.

Icelandic
The sample was a very white fleece with open, nondistinct locks. I know this breed is dual coated, but that was not at all obvious when just looking at the sample.

Combing and Carding: My small handheld combs passed easily through the fiber, but I found it very difficult to pull top off of the combs, even when I pulled just the smallest amount of fiber. For carding, I used my fine tooth carders on the waste from the combs, but found that the batt did not hold together well. It seems that Icelandic would do best with no more prep that washing the locks, removing the outer coat and spinning from the locks. I could not really do that with this sample, I just could not see any difference in the fibers.

Combed top: This wanted to be spun with a very long draw. The fiber felt very harsh but the resulting yarn was very smooth with a slight halo. The 14 yard skein measured 15 WPI.

Carded batt: This was nice to spin and gave a soft puffy yarn of an off white color. The 12 yard skein measured 15 WPI.

Even though I could not see any evidence of the two coats in the fiber sample, it became very obvious that they were present after I combed the sample. What happened during combing was I pulled the harsh outer coat (thiel) off leaving the softer tog. So the yarn from the combed top was shiny and harsh and the yarn from the carding was the softness of the tog.

Targhee
This washed sample of fiber was in very tight clumps of short white fleece. Occasionally a lock was visable but most of it was in clumps. The staple appeared to be about 2 inches in length and the fiber has a cottony feel.

Combing: The fiber combed easily with my small handheld combs. A large amount of waste was left on the combs when I pulled off the top. The waste was very full of neps and clumps and was not really good enough to use.

Carding: I did not like the way this fiber carded. I tried both my wide tooth cards and my fine tooth ones. Neither set of cards would produce a batt that held together. Also there was a large amount of neps in the fiber, which was carded right into the batts.

Combed top: Here again was a fleece that showed a big difference spinning combed and carded top. The combed top was wonderful to spin, drafting easily. The fiber and the yarn had a nice spring to it. My only observation is that I had trouble joining new pieces of top while I was spinning. Also in spite of the easy drafting, occasionally I would hit a thick area of the top, and it just would not thin out. So I did not get the usual consistently thin yarn that I often get with top. My sample skein of 2 ply measured 16 WPI.

Carded batts: Very soft fiber, but very neppy. At first I was having a very difficult time spinning the batts. I tried on my Roberta first, and could not get a good draft going. I tried on a drop spindle, but ended up with a very lumpy yarn that I did not like. I took the time to really predraft the batt to very thin, and then spun that on the Roberta and I was able to get a yarn that I liked. It was still very thick/thin, but consistently so. The 15 yard skein measured 10 WPI.

Coopworth
The washed sample of fiber was a very white color, with only a slight yellowing to the tips. The locks were open with a wide wavy crimp measuring about 6 inches long. The fiber felt rough to the hand.

Combing and Carding: I combed all of the sample fiber and used the comb waste in the carded batts. The combed top was slightly stiff with a nice luster in it's appearance. The comb waste carded nicely into batts, with very little neps or VM in the fiber.

Combed top: I spun this on my Roberta electric and found it to be an easy fiber to spin. I did have trouble making joins, the slicker fiber not wanting to 'catch' like it usually does when I make joins. The 18 yard skein measured 14 WPI and had an itchy feel to it.

Carded batts: I spun this sample on several different drop spindles. A medium weight spindle worked best. This is a very good fiber and fiber prep for beginning spinners, it works well with the 'park and draft' method of spinning. All of my samples skeins ended up very bulky and loosely plied.

Corriedale

Finally a colored sample of fiber! This washed fleece was a dark brown color with sun bleached tips. There was very few intact locks, and the staple measured around 3 inches. The fiber is soft to the touch and very springy, from the high crimp.

Combing and Carding: This sample was almost impossible to comb with my hand combs. What I did comb came off in very short puffs, I could not pull a connected top at all. The fiber did better with hand cards although not the fine tooth cards, just the wide tooth cards. It did make a nice lofty batt.

Combed top: What little sample I had made a lovely lace yarn. It was very hard to draft with anything but an inchworm short draw. My sample skein was only 6 yards of 2 ply but measured a nice 19 WPI.

Carded batts: This did not spin as well as I had expected. It was very hard to get a smooth yarn, and the VM would not just drop out as I was spinning, like other fibers. I would live with the bumpy yarn though because of the lovely brown color, and because the wool was very soft to the touch. I spun a large 35 yard skein that measured 13 WPI.

Montadale
This washed sample of fiber was in long loosely crimped locks. The fiber had been picked apart after washing so there were no intact locks left. The color was off white.

Combing and Carding: The fiber was easy to prep with both combs and hand cards. The combs produced a crisp feeling top that was medium soft to touch. The cards produced a fluffy batt with very few neps.

Combed top: Very lovely to spin, drafts easily and spun into a smooth yarn that fluffed up more than usual for top. My 12 yard sample skein measured 11 WPI.

Carded batts: I discovered that the nice fluffy batts were not easy to spin. The fibers seemed too tangled to draft easily, even with predrafting. My 2 ply sample skein measured 11 WPI. It surprised me that I got the same WPI in both yarns, when one was so much easier to draft.

Romney
This sample looked just like all of the classic Romney fleeces I have seen. The loosely crimped locks were open and showed some luster. The fiber was medium soft to the hand, off white in color with slight yellow staining at the tips.

Combing and Carding: Both types of prep work very well for this fiber. The combs go through the fiber easily, although the top was slightly difficult to pull from the combs. The carding produces nice fluffy batts. The two preparations look almost similar, except the carded batts still contain the VM that falls out when the fiber is combed.

Combed top: Very easy to spin producing a thin yarn with a halo, unlike most combed tops. The yarn was still scratchy. I thought this would be a lovely fiber to use when making crewel or needlepoint yarn. You could get a nice thin 2 ply yarn, and the luster in the fiber would make any dyeing look wonderful.

Carded batts: It becomes very obvious why this is a great fiber for those that are learning to spin. The fiber in the batts drafts easily, and the wool has a great 'grabbing' ability, when making joins. The only thing I observed is that the VM was not just falling out of the drafting zone as will often happen when I am spinning. I also noticed it takes a higher amount of twist than I expected, probably another reason it is good for beginner spinners! My 2 ply sample skein was 13 yards and bulky at only 10 WPI. The yarn felt scratchy to the hand, and had a larger halo than the combed top skein.

Blue Face Leicester
This washed sample of fiber was in tiny corkscrew dreadlocks. The locks had lots of sheen and were very soft. The tips were bad on all of the locks, so I removed them by just tugging on the tip and pulling it off.

Combing and Carding: This was a hard sample to process with my home hand tools. If I bought a whole fleece like this I would send it to a commercial processor. I could not get the tiny locks to open with my combs, so I had to open each lock before putting it on the combs. There was a large amount of waste on the combs after combing, but I was able to pull some top from half of the sample. The fiber carded nice but the batts still contained a high amount of neps.

Combed top: Again this fleece proved the value of combing a neppy fiber even if it is a large amount of work compared to carding. There was a difference of night and day between spinning the combed top and carded fiber. This top was lovely to spin and the resulting yarn was very soft with just a slight halo. I only had a 6 yard skein of 2 ply from my combing, which measured 14 WPI.

Carded batts: I would not consider spinning this type of fiber normally, as the resulting yarn was so bumpy it was unattractive. It was full of neps that could not be removed while spinning. I got so tired of trying to pull them out, that I just spun the batts up with the neps in it. The yarn was very soft but too full of neps and VM to be of any use. My sample skein was 11 yards of a single which I didn't even bother to measure WPI.

I have spun over a pound of BFL commercially prepared top and it makes a lovely soft yarn, although the above skein from my combed top did feel softer to me. This was just a good learning experience that I do not want to home process BFL and so will not buy that type of raw fleece.

Columbia
This washed sample of fiber was mostly in open puffs, having been picked open after washing. The few intact locks in the sample were open with a wavy crimp. The color was white with a slight discoloring to the tips.

Combing and Carding: Of the two processes, this fiber is better when carded. It combed easily enough, but unless I pulled very carefully the top would come off in short bursts, not a continuous top. The hand cards made very nice batts, especially if I took the time to card the fiber twice.

Combed top: I spun this on a meduim weight spindle, and it was really nice to spin. The fiber does not work well with the park and draft method, it needs a continuous draft with the spindle. My 7 yard 2 ply skein was 16 WPI and had a lovely feel to it, not exactly soft but pleasant.

Carded batts: I was surprised to find so many neps in the batts as I was spinning, I did not see them while carding. I used a long open drafting zone on my Roberta and did not try to spin it thin. The 2 ply skein was a generous 28 yards that measured 14 WPI. The yarn was creamed color and has a very crisp pleasant feel to it. I liked both of the skeins, with just the right amount of uneveness to look handspun, and the perfect balance of crispness with softness to the feel.

Perendale
This washed sample of fiber was in wide, open wavy locks with little crimp. It was cream colored with some yellow on the tips. The was a light luster look to the locks, and they felt slightly scratchy.

Combing and Carding: I found that this fiber combed best when the combs were very loaded with fiber, unlike many of the fibers I comb which did best with just a small amount on the combs. I could not really pull off a connected top, just large puffs of fiber. The waste was very short and not usable. The open locks carded into nice batts with just one carding, although I had to deal with lots of static, so this fiber is best dealt with in humid conditions (or premoistened slightly before carding)

Combed top: This was very nice to spin. I was drafting very thin and thought I would be getting a thin yarn, but the 2 ply measurements surprised me by only being 13 WPI. The skein was 12 yards. There is a good slick feel to the yarn with little fuzz, so it would work wonderfully for a crewel work yarn or warp for rugs. I really liked the off white color of the skein, it looked like an antique white. This skein was balanced when I released the tension, unlike the carded batt skein.

Carded batts: This was also very enjoyable to spin, the fiber drafts easily and the fiber has a pleasant feel to my fingers as I spun. The yarn was thick and bouncy and surprisingly softer than I expected. My skein of 2 ply measured 10 WPI and was not balanced when I released the tension, so I did overspin or overply. I imagine that would be corrected with a soak in hot water, but I did not wash any of my sample skeins since the fiber was already clean.

Polworth
This sample was supposedly washed, but it was a dirty looking white. The locks were very short, tightly crimped and non distinct. There was a soft cottony feel to the fiber. When I picked open the locks, there was a distinct sticky feel of lanolin, so the washing had not removed all of the lanolin.

Combing and Carding: I could not comb this sample. I do not know if it was due to the shortness of the locks, or the residual lanolin. But it was very hard to pull any top off of the combs. Carding was fairly easy and produced nice batts, although again the fact the fleece was not clean did affect the quality of the batts. If this had been a larger sample, I would have washed half of it to see the difference, but did not try and split up such a small sample.

Combed top: There was very little to spin so I used a medium weight spindle and made a 3 yard 2 ply yarn that surprised me by measuring 18 WPI.

Carded batts: The stickiness of the fiber made it hard to draft and the yarn was dirty looking. Looking back now as I write this, I should have tried heating the yarn in the microwave for a short few seconds and see if that helped the drafting. I know this is a trick spinners use when they are trying to spin 'in the grease'. My sample skein was spun on my Roberta and was 22 yards of 2 ply that measured 14 WPI.

Cormo
This sample was very white with a soft cottony feel. The few intact locks were tightly crimped. Most of the fiber had been picked apart after washing. The fiber was very clean and not felted with surprised me, as I know cormo is hard to wash at home and remove all of the lanolin.

Combing and Carding: This was a wonderful fiber to comb. I had to watch and not overload the combs. If just the right amount of fiber was put on the combs I could pull off a continuous top. Too much or too little and I would only be able to pull short bursts of top. I saved the comb waste for carding with the batts, even though it seemed high in neps. I had to watch and not overload the hand cards also. If I got the right amount on the carders, I got a nice batt, and many of the neps popped to the top of the fiber on the cards and could be pulled off before doffing the batt from the card.

I took the time to diz the combed top. I did not do this while the fiber was on the comb, but after I had pulled off the top. I took the top and started several fibers through the pinhole diz and just pulled the entire top into a much thinner longer top this way. I had about five yards of top when I started but I did not measure the diz top, it was much too thin to be handled while measuring.

Combed diz top: This was absolutely wonderful to spin. I had to put a cardboard box lid on my lap to keep the fiber from sticking to me, because keeping the fiber free flowing was very important while spinning it. I found my drafting area was thinning this already thin top by about half, so I was spinning very thin for me. It is hard to make joins when it is this thin. The join has to start far up from the end, and be very thinnly added so the yarn does not show thickened areas in the joins. My single measured 35 WPI and I was able to make that top spin into a whopping 30 yard skein of 2 ply that measured 22 WPI. The yarn looked like wonderful lace weight while under tension, but as soon as it was released from the niddy noddy, it looked like sock weight, it puffed that much.

Carded fiber: I found out the comb waste really was not worth saving, even though it felt fine to my hand, it was full of neps and made a very lumpy yarn. In the spirit of 'waste not, want not' I think I would take this type yarn, and make washcloths. The bumps should be nice scrubbing feel to them, and the yarn is definately next to the skin soft. My 2 ply 12 yard skein measured 12 WPI.

Lock Spinning: I had saved 18 intact locks from the sample to try lock spinning. I opened each lock with a metal tooth dog comb, combing from middle out at both ends. The locks were easy to spin, and always surprise me by just completely disappearing into spun yarn. The resulting yarn measured the same as the combed top, a pleasant surprise, since if one can lock spin the same type yarn, why bother with all of the processing? My 7 yard sample of 2 ply measured 22 WPI.

Polypay
This sample was not well marked and I purchased it way back when I was not labelling very well. By the markings on the bag, I think it may have been a polypay/karakul cross.

I purchased this sample raw, so I had to wash it. The long open wavy locks were very dirty and canary stained in various areas of the locks. The dirt washed out easily but the tips remained somewhat matted and dirty. The fiber washed clean with no stickiness with just regular hotwater heater temperature water.

Combing and Carding: The locks were just a bit too long for both the combs and carders. The combs went through the fiber fine, but the top was hard to pull off. I would get one good pull of top and then the rest were short burst, telling me there was a wide varience in the lengths of fibers in the locks. The locks did open up and card on the hand cards but the longer length made it harder to card.

Combed top: This spins wonderfully just like all top. The yarn was a smooth, crisp 2 ply. The 10 yard sample measured 14 WPI.

Carded batts: These were nice to spin, drafting easily with a soft feel to the fiber. There was not much loft to the yarn though, which surprised me for carded batts. The canary staining on the fiber blended into the yarn to give the skein a nice antique white color. My 13 yards of 2 ply yarn measured 16 WPI. This is one of the few times I found that the carded fiber gave a thinner yarn than the combed top.

Canadian Arcota
This was another sample of fiber I purchased just because I had not seen the breed's fleece. The fiber was raw and in short, moderately crimpy locks. The locks all fell apart when washed probably because the fiber was very dirty and took two washes and three rinses to come clean.

Combing and Carding: This fiber was very hard to comb. The combs did not want to pass through the fiber, the VM did not fall or comb out as usually happens with combs, and the top was hard to pull off of the combs. Enough said about that! Before I tried the hand carders, I decided to pick the fiber apart. I found it was very hard to pick apart, not because it was sticky with lanolin, just because the fibers had become very tangled in the washing process. I am very careful when I wash fleece, little agitation beyond moving the handfuls of fiber from wash to rinse water. So the tangling surprised me. I noticed while picking the fiber that it has a very cottony feel to it, and I think that is what was causing the tangling. The VM would not fall out when picking. I did card the fiber with my fine tooth hand cards, twice, but still was not very happy with the resulting batts.

Combed top: This produced the better skein of the two processes, but it was hard to spin and I consider not worth the work, even though the resulting yarn is next to the skin soft. It would be interesting to spin commercially processed fiber from this breed, to see if that would take care of so many of these problems. My small 5 yard skein puffed alot once released from tension and measured 14 WPI in the 2 ply.

Carded batts: This also was not fun to spin, in spite of the soft hand, it somehow just does not feel like 'wool' to me. My sample skein was spun on my Roberta, and the 8 yard skein of 2 ply lumpy yarn measured 9 WPI.